ECommerce is better with Mobile (and Saleor)

An ECommerce journey on a mobile website is smooth enough… until it isn’t.
Its friday night, you’ve just pressed “Buy it now” and you’re ready hand over your hard earned money to HeavenlyHomeProducts.com. The time has come to enter your address details, but the keyboard pops up, covering most of your phone’s screen. Now you have to find the tiny amount of draggable screen space to scroll down and check that the correct element is in focus. Its enough to make you give up, and your laptop is all the way upstairs, maybe I don’t need that new shabby-chic sponge holder after all…
Did you know mobile apps can run at almost 5x the speed of Javascript on your mobile version of Chrome? Its possible that a mobile app could unlock a better experience for your users and stop you losing them halfway through a purchase, and if that doesn’t pique your interest consider the following,
Thinking back over the past decade since mobile apps first exploded onto the scene, so many commerce sites have lured me over to their mobile app with a “£15 off your next order” offer, and I’m not complaining.
For a recent project at SanDigital we wanted to leverage some of the above-mentioned benefits of mobile apps for an ECommerce solution. Previously we had used a combination of Stripe and Saleor to create a web solution for a client, and we noticed stripe-react-native has some nice mobile features, such as “Scan Card” and ApplePay + GooglePay.
We were also keen provide a “Mobile Accelerator” for Saleor, allowing prospective Saleor users to get an ECommerce app up and running in a matter of minutes.
So we decided to build a simple ECommerce mobile app. Let’s get to it!
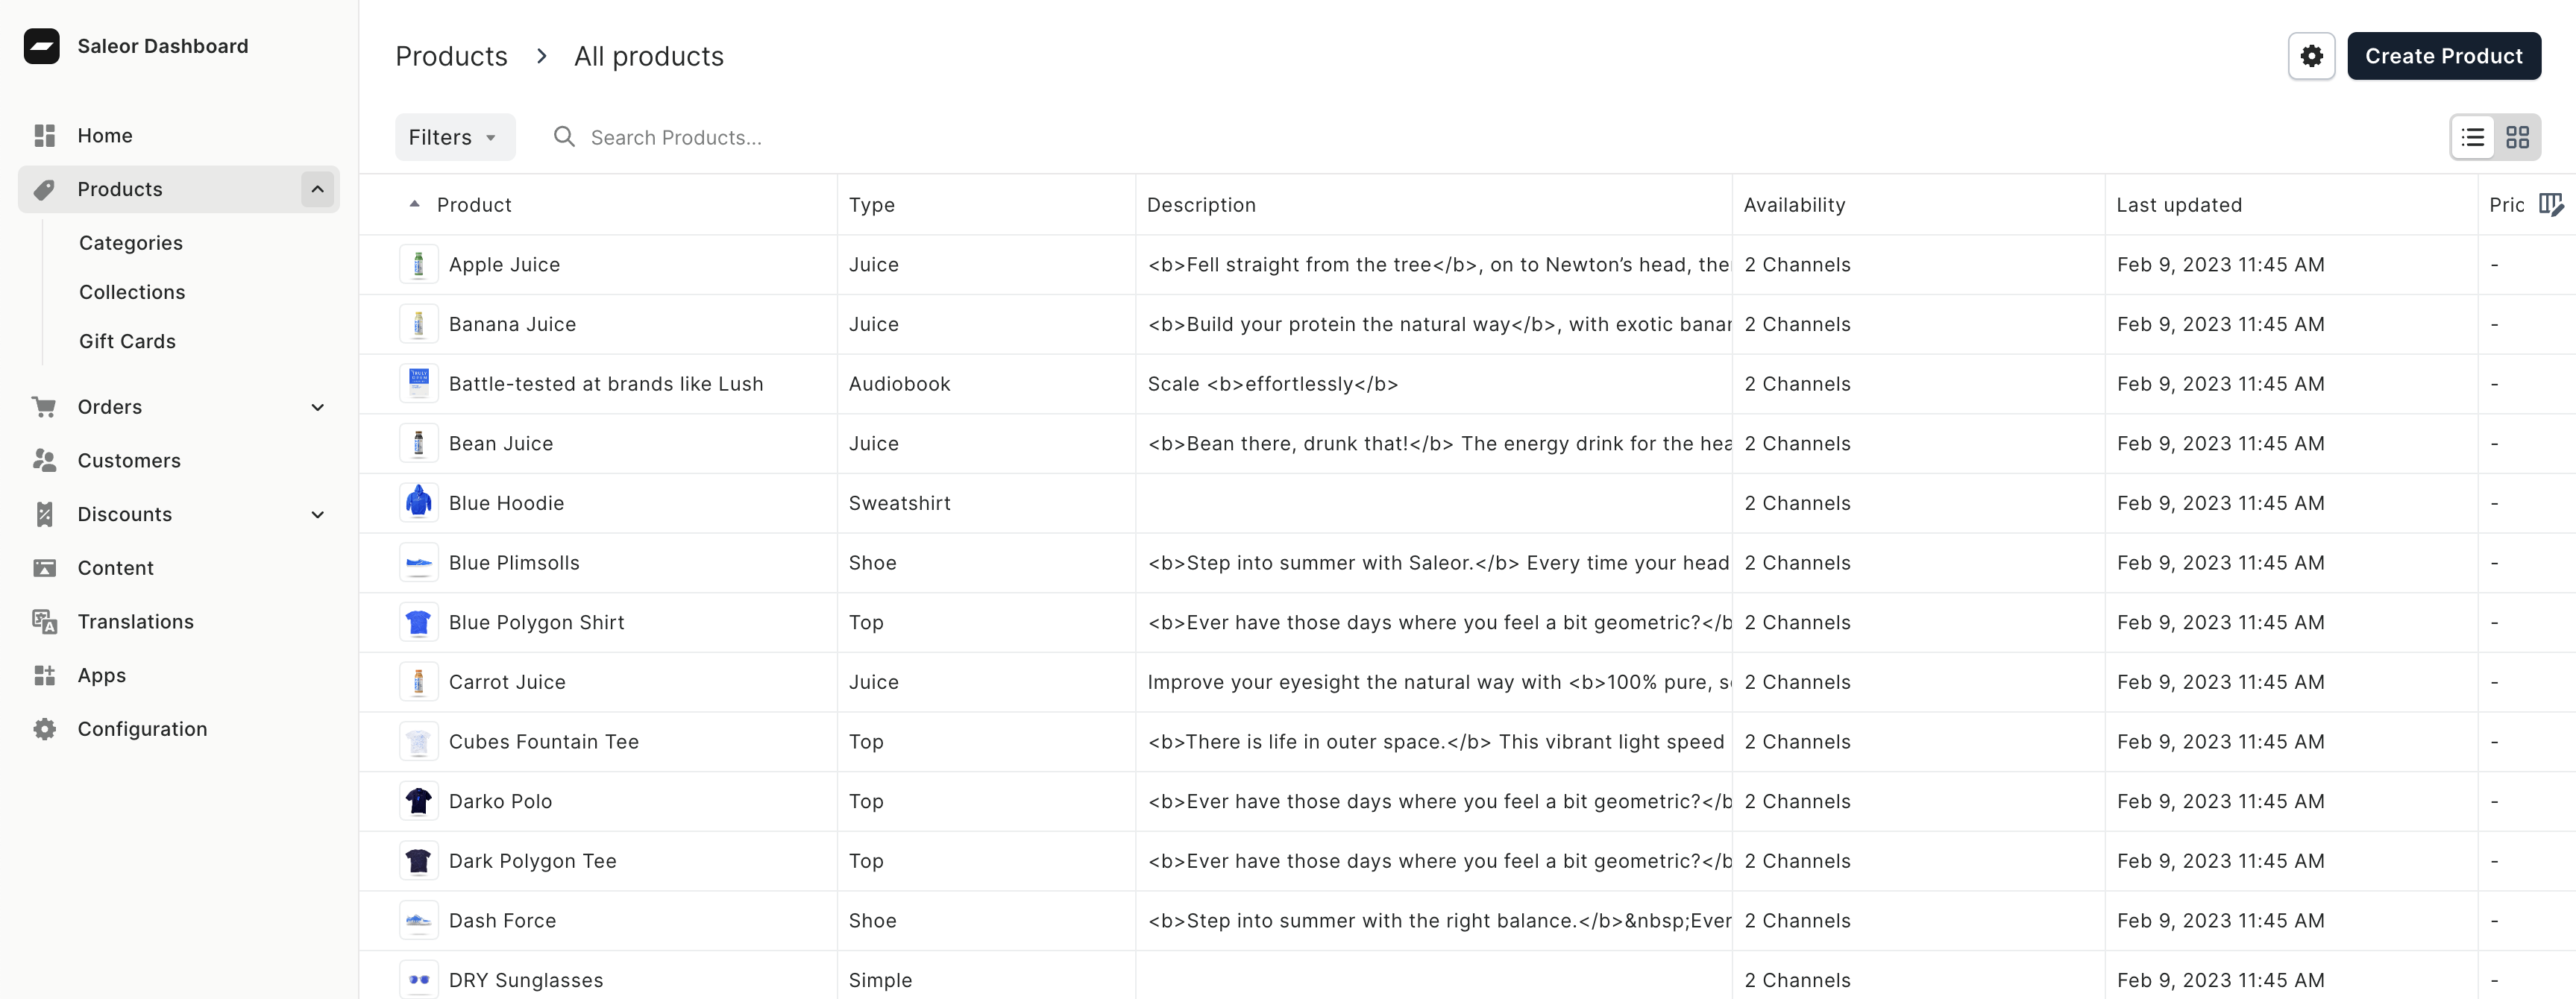
Saleor describes itself as a “commerce API that puts developers first”, they provide a Cloud or self hosted ECommerce backend solution built using GraphQL alongside a handy UI for things like product catalogue and order management. Their platform also provides handy integration with payment providers such as Stripe and their order apis allow for easy integration with your own fulfillment solutions.
You can see this UI below, listing all products on the Saleor cloud backend.

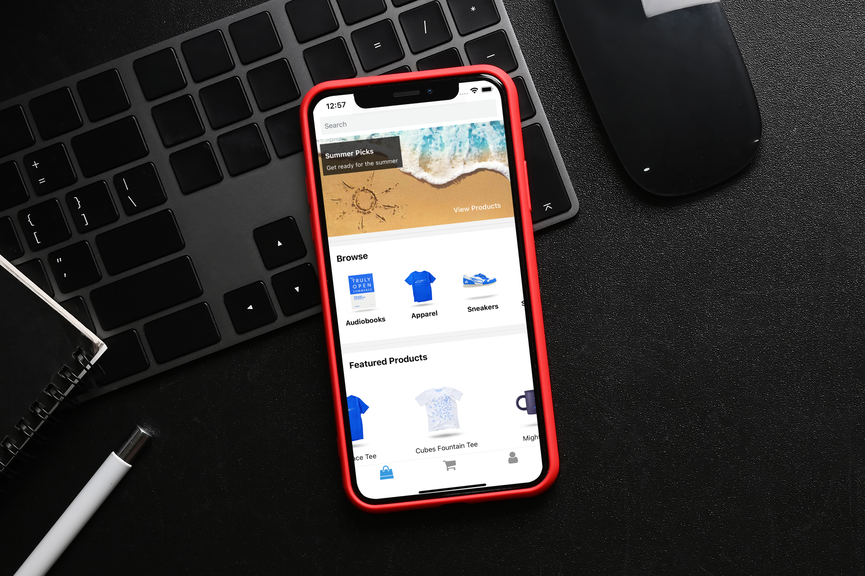
For simplicity (and brevity) we are going to start at the point of a working ECommerce app that allows you to browse a Saleor product catalogue. Here we created a Dashboard utilising the Collections and Categories apis to display new offers or product types are available in the app.

Then by clicking on Summer Picks its possible to browse the products in that collection using the search api (passing in the required filters) and view the products in detail.


Products can then be added to a Cart (“Checkout” in Saleor).

Once we had created a Cart we were ready to try out some mobile features you can’t get on the web. The Stripe Mobile Payment elements provide a cool bottom sheet that integrates neatly with Apple and Google pay. And most of us will have our credit card information already preauthorized on our mobile device, which can make the checkout process as simple as a single click.
So how do we do this in code?
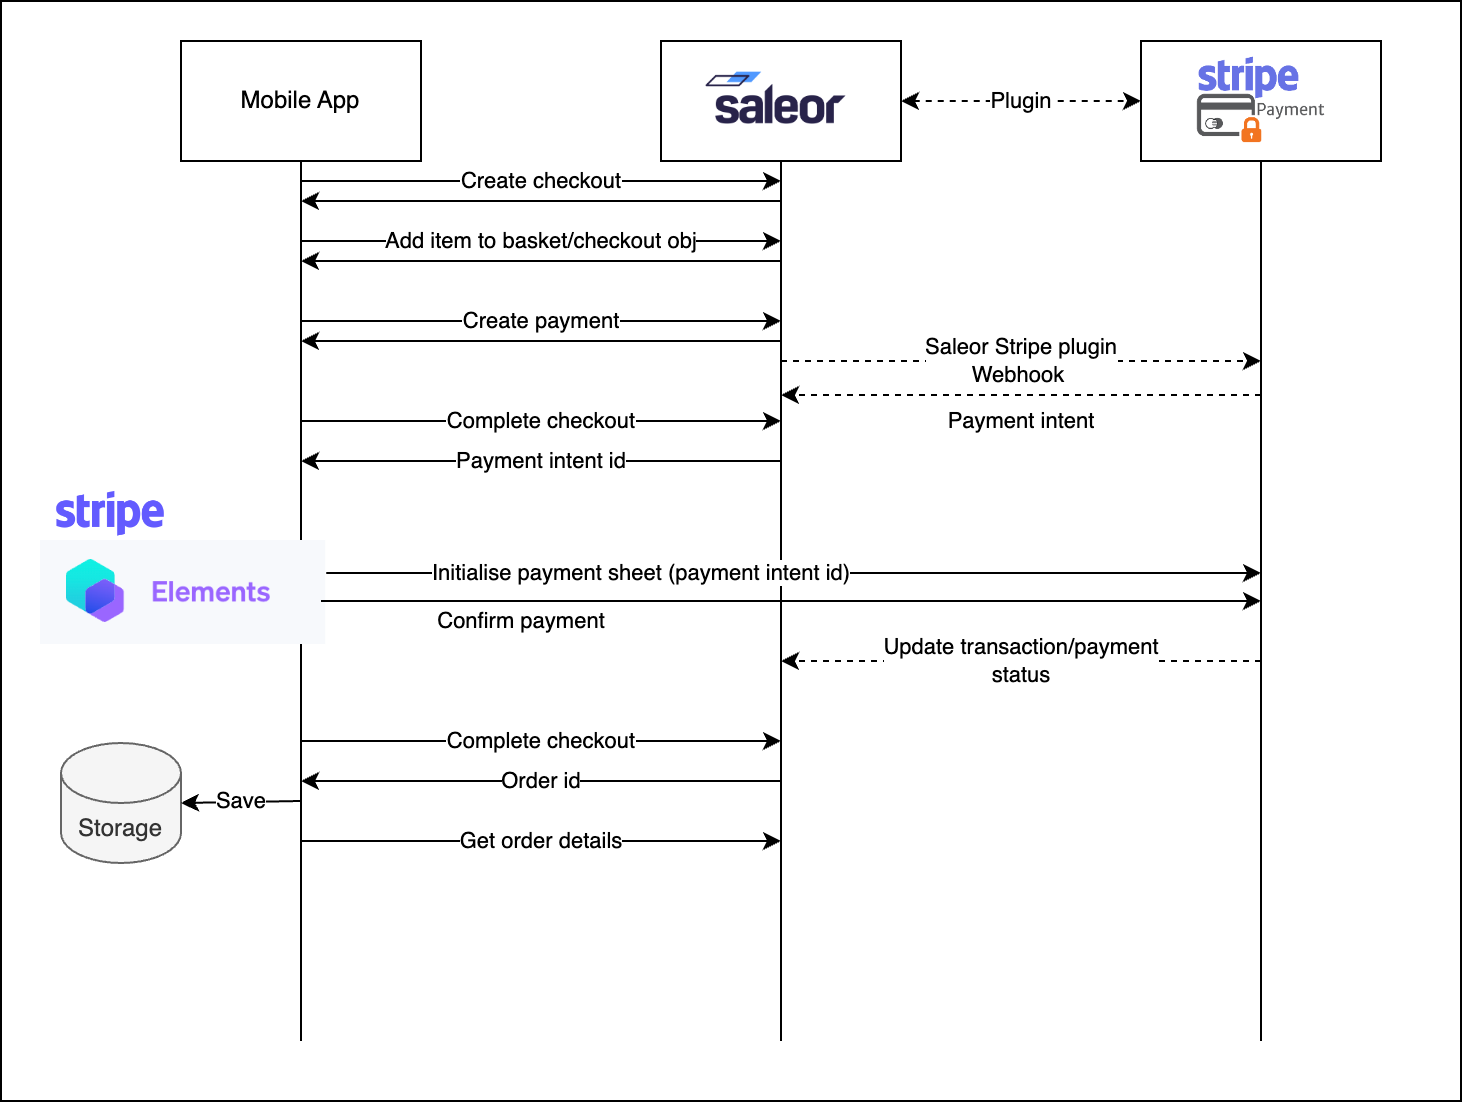
Much like the Stripe web elements we need a payment intent to open the payment sheet. A Payment Intent contains information regarding the amount to be charged, and once payment is completed any service listening to a Stripe Webhook can update its own system accordingly.
Listening to the Stripe hook can be easily achieved in Saleor, without using any code, via the Saleor Stripe Plugin.
Once configured, with the two talking to each other, creating a payment via the Saleor api will then trigger a Payment Intent creation in Stripe and Saleor will respond to the original api request with a payment intent. This response contains the client_secret and id that we can use in our front end code.
This can be seen in more detail in the payment flow below.

To do this in code we first need to create the payment using the Saleor Graphql API.
const { cart } = useCartContext();
...
const createPaymentResult = await createPayment({
    variables: {
        checkoutId: cart.id,
        paymentInput: {
            amount: cart.totalPrice.gross.amount,
            gateway: "saleor.payments.stripe"
        }
    }
})
const checkoutCompleteResult = await completeCheckout({
    variables: {
        checkoutId: cart.id
    }
})
and final checkoutComplete response will look as follows.
{
  "data": {
    "checkoutComplete": {
      "order": null,
      "confirmationNeeded": true,
      "confirmationData": "{\"client_secret\": \"...\", \"id\": \"...\"}",
      "checkoutErrors": []
    }
  }
}
Now we have obtained the client secret (below abstracted behind a custom usePaymentContext), we can use the Stripe react native libraries to open a payment sheet.
import {
  initPaymentSheet,
  presentPaymentSheet,
} from "@stripe/stripe-react-native";

const { confirmationData } = usePaymentContext();

await initPaymentSheet({
  merchantDisplayName: "Example, Inc.",
  paymentIntentClientSecret: confirmationData.client_secret,
});
await presentPaymentSheet();

convertCartToOrder().then((result) =>
  router.push("orderDetails/" + result.orderId)
);
Running the code above opens the mobile payment element, a handy additional feature like “Scan Card” can be seen below.

And beacuse await presentPaymentSheet() is blocking, we can wait for the payment to be confirmed and convert the cart to an order using Saleor graphql apis.

Hey presto we have placed an order!

And we can see the payment on the Stripe dashboard.
At this point we’ve created a handy app that can be configured to be used with any Saleor and Stripe instances (simply by changing SALEOR_API_URL and STRIPE_PK env variables).
The code base is ready to be extended and branded, so if a mobile app is something you are considering for your ECommerce shop, get in touch.
Let’s do something great